Monitoring Nginx with New Relic

Apache HTTPd has always been my goto httpd, reverse proxy and load balancer but lately I’ve grown more interested in Nginx. It’s very high performance and lightweight not to mention easy to configure. Of course with my currently a single Nginx I wanted to see how could I hook it up my monitoring. Turns our there’s a New Relic agent directly from Nginx.
From the overview you can see the number of active and idle connections as well as the request rate.
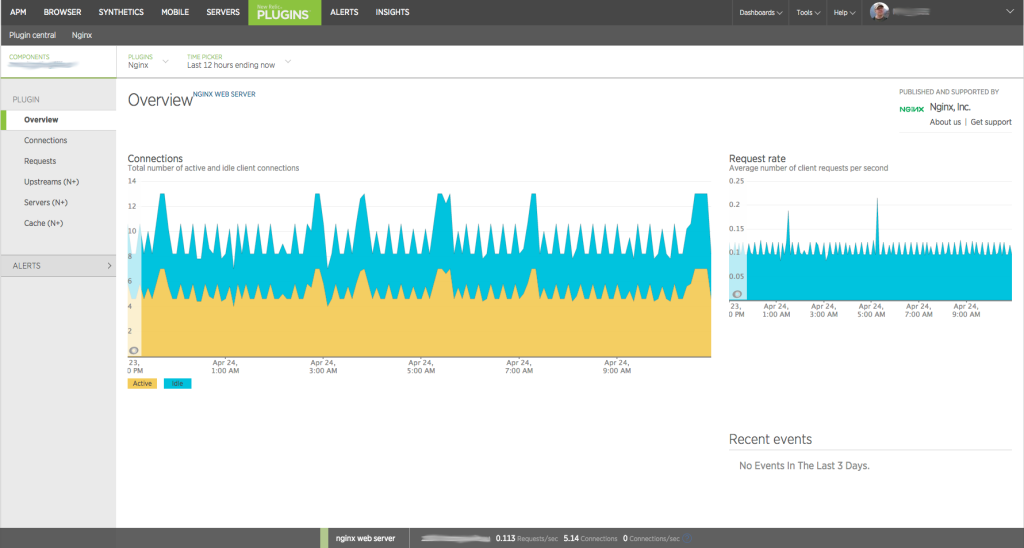
From connections you’ll even more connection details. With very little connections and requests my graphs are currently slightly boring. In addition to connection details you can find more details about requests, upstreams, servers and cache.

Installing New Relic Monitoring Agent for Nginx
1) First you need to add the Ubuntu package repository for Nginx. If you’ve done this already when you installed Nginx you can skip to next step. If you are not using Ubuntu 14.04 like I am you can find the other Linux packages from Nginx website.
wget http://nginx.org/keys/nginx_signing.key
apt-key add nginx_signing.key

cat - <<-EOF >> /etc/apt/sources.list.d/nginx.list
deb http://nginx.org/packages/ubuntu/ trusty nginx
deb-src http://nginx.org/packages/ubuntu/ trusty nginx
EOF

apt-get update
2) Next you need to install the Nginx New Relic Agent
apt-get install nginx-nr-agent
3) Next you’ll need to edit the agent configuration file in /etc/nginx-nr-agent/nginx-nr-agent.ini. You need to add your license key which you can find from your account settings page on rpm.newrelic.com.
newrelic_license_key=YOUR_LICENSE_KEY
Additionally you need to add a new source which points to your Nginx status url.
[source1]
name=localhost
url=http://localhost/nginx_stub_status
4) You’ll need to add a server block to Nginx for the status. Since I had very simple configuration in my Nginx I just added the following to /etc/nginx/sites-enabled/default
server {
   listen 127.0.0.1:80;
   server_name localhost;

   location = /nginx_stub_status {
     stub_status on;
     allow 127.0.0.1;
     deny all;
   }
}
5) Last thing you need to do is reload Nginx and start the Nginx New Relic Agent.
service nginx reload
service nginx-nr-agent start
Now in few minutes you should start seeing your Nginx server listed under Plugins Nginx on rpm.newrelic.com.
The post Monitoring Nginx with New Relic appeared first on Javaguru.